
TL;DR: Water damage restoration follows a defined sequence: inspect and map moisture, extract standing water, remove unsalvageable materials, dry the structure with commercial air movers and dehumidifiers, monitor daily until readings hit the dry standard, then rebuild. A properly run job takes 3 to 5 days of active drying for most residential losses, plus additional time for reconstruction. Skipping or rushing any phase risks hidden moisture, structural rot, and mold growth within 24 to 48 hours.
If you just walked into a flooded room and you’re trying to figure out what the next week of your life looks like, this is the post for you. The water damage restoration process has a defined order for a reason: each step depends on the one before it. Understanding the sequence helps you ask the right questions, hold your contractor accountable, and know whether your insurance documentation is complete. Here’s exactly what should happen, from the moment a crew arrives to the day you get your home back.
What does a restoration company do when they first arrive?
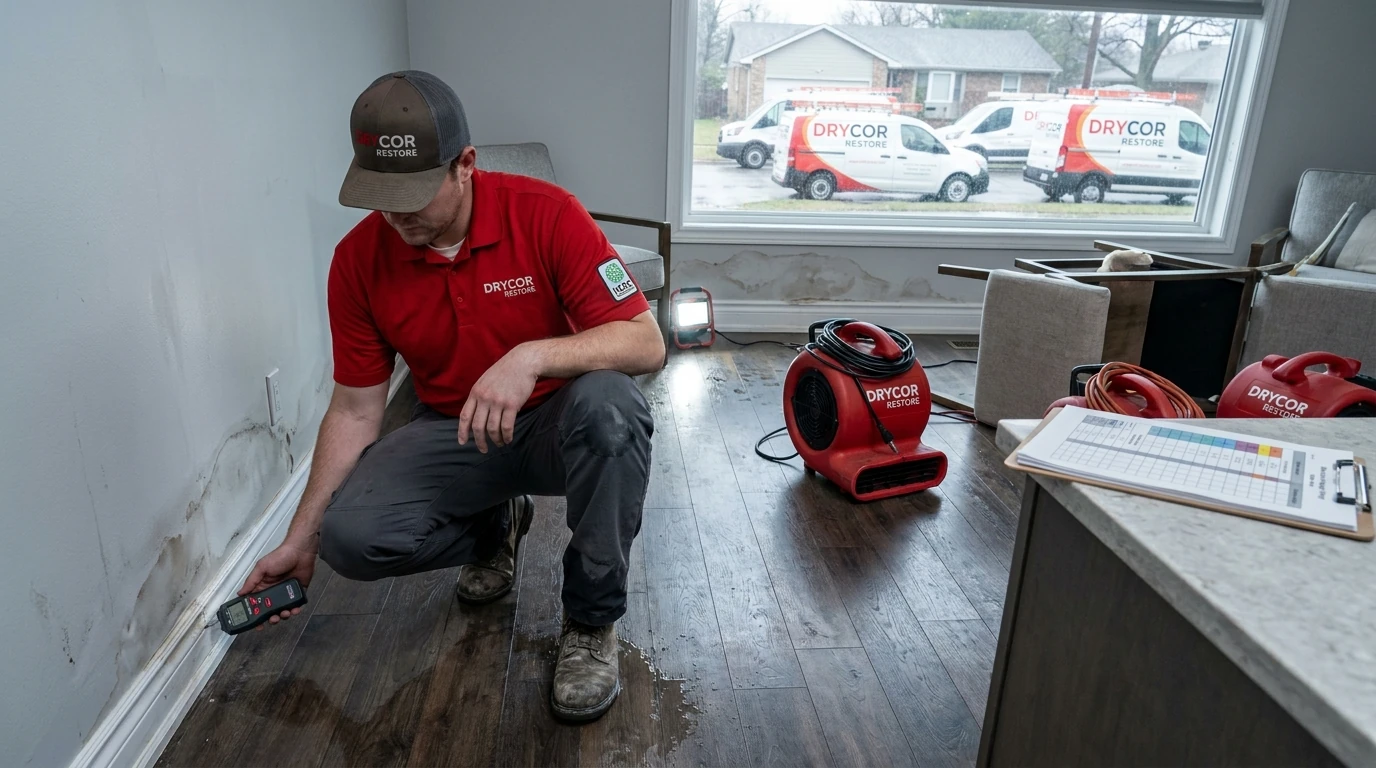
The first thing a trained crew does is assess and document, not start ripping things apart. On arrival, technicians classify the water source and map every affected surface before a single piece of equipment is deployed. This inspection phase sets the scope for everything that follows.
Water is classified into three categories under the IICRC S500 Standard for Professional Water Damage Restoration:
- Category 1 (clean water): Broken supply lines, overflowing sinks, appliance failures. Lowest contamination risk.
- Category 2 (gray water): Washing machine discharge, toilet overflow without solid waste, dishwasher leaks. Contains microorganisms and chemical contaminants.
- Category 3 (black water): Sewage backups, floodwater from outside, any water that has sat long enough to grow bacteria. Highest contamination risk; requires full PPE and antimicrobial treatment.
The category determines how aggressively materials need to be removed and what sanitization protocol applies. A Category 1 pipe burst in a finished basement is handled very differently from a Category 3 sewage backup in the same space.
After categorizing the source, technicians use moisture meters, thermal imaging cameras, and sometimes penetrating probes to map the full extent of saturation. Water travels. It wicks up drywall, migrates under flooring, and hides inside wall cavities. A moisture map documents every affected reading so the drying goal is measurable, not guesswork.
How do restoration companies extract water and remove wet materials?
Extraction removes the bulk of standing water before drying equipment can work effectively. Truck-mounted extractors or portable units pull water from flooring, carpet, and subfloor. Weighted extraction tools press into carpet to pull water from the pad underneath. The faster this step happens, the less water migrates into adjacent materials.
After extraction, the crew evaluates what can be dried in place and what has to come out. This is called controlled demolition, and it sounds more dramatic than it is. In practice, it usually means:
- Removing wet drywall to 12 to 24 inches above the visible waterline (the moisture map guides the exact cut height)
- Pulling saturated flooring (carpet, pad, laminate, sometimes hardwood depending on the extent of swelling)
- Removing wet insulation from wall cavities, since insulation holds water like a sponge and cannot be dried in place
- Detaching base molding to expose the wall-to-floor joint, a common moisture trap
For contents, salvageable items (furniture, electronics, clothing, documents) are either moved to a dry area of the home or packed out entirely for professional contents restoration and storage off-site. Items left in a wet structure during drying can re-introduce moisture into the drying environment and slow the process.
If you have a burst pipe situation, the source of water needs to be confirmed as stopped before extraction begins. Active leaks during extraction are a common reason jobs take longer than expected.
What equipment is used to dry a house after water damage?
Commercial drying equipment works as a system: air movers create airflow across wet surfaces, dehumidifiers pull the evaporated moisture out of the air, and the combination drops the humidity in the affected space to a level that forces moisture out of building materials.
The key pieces of equipment on a typical residential water loss:
- LGR (Low Grain Refrigerant) dehumidifiers: These pull moisture from air that standard dehumidifiers can’t reach. A properly sized LGR can remove 100+ pints of water per day from a residential space.
- Axial and centrifugal air movers: Positioned at wall-to-floor joints and aimed along wet surfaces to maximize evaporation. Placement follows a calculated ratio based on the square footage of affected area.
- Desiccant dehumidifiers: Used in large commercial losses or when ambient temperatures are too low for refrigerant units to work efficiently.
- HEPA air scrubbers: Deployed when mold is suspected or when Category 2 or 3 water is involved, to filter airborne particulates and contaminants.
- Negative air machines: Used to create containment pressure differentials, preventing cross-contamination from affected to unaffected areas.
The crew calculates how many units are needed based on the affected square footage, the Class of loss (Class 1 through 4 describes how deeply water has penetrated materials), and the ambient conditions. Underequipping a job is one of the most common reasons residential drying jobs run over time.
Equipment runs continuously, typically 24 hours a day. Turning it off at night to reduce noise is a mistake that resets drying progress.
How long does water damage take to dry?
Most residential water losses dry in 3 to 5 days of continuous equipment operation under the IICRC S500 standard, assuming extraction and demolition were done correctly. More severe losses, or losses involving dense materials like hardwood subfloor or concrete slab, can take 7 to 10 days or longer.
Drying is not declared complete based on calendar time. It is declared complete based on daily moisture readings that meet the established dry standard for the affected materials. A technician visits the job each day, takes readings at every documented moisture point, logs the data, and adjusts equipment placement as needed. The job is done when readings return to the pre-loss baseline (or the regional equilibrium moisture content for the material type).
This daily monitoring log is also critical insurance documentation. It proves that drying was completed to standard, which protects the claim if a secondary issue (like mold) surfaces later. If a contractor is not providing you with daily moisture logs, ask for them.
For more detail on what your policy covers during this process, see the homeowners insurance and water damage guide.
What are the most common mistakes during water damage restoration?
Rushing the drying phase is the single biggest mistake on residential water losses. A structure that tests dry on the surface can still carry elevated moisture readings inside wall cavities or beneath flooring. Closing up the job early leads to mold growth, odor, and structural deterioration that costs far more to fix than the original loss.
Other common problems:
- Inadequate extraction before drying: Leaving standing water or saturated pad in place forces the dehumidifiers to work against a much larger moisture load.
- Skipping controlled demolition: Trying to dry wet insulation or Category 2-saturated drywall in place almost never works. The material holds moisture too well.
- Wrong equipment quantity: A single consumer-grade dehumidifier from a hardware store is not a substitute for commercial LGR units. The math on evaporation rates doesn’t support it.
- No moisture mapping at close: If the final readings aren’t documented, there’s no proof the job was completed to standard.
- Ignoring contents: Wet furniture left in the drying zone re-introduces moisture and can harbor mold that then spreads to the structure.
The EPA’s guidance on mold and moisture notes that mold can begin to grow on wet building materials within 24 to 48 hours. That window is why the extraction and demolition phases are time-critical, not optional.
What happens after the structure is dry?
Once the structure reaches dry standard and the final moisture readings are logged, the mitigation phase is complete. At that point, reconstruction begins: drywall is hung and finished, flooring is installed, trim is replaced, and the space is restored to its pre-loss condition.
Reconstruction is scoped separately from mitigation. Your insurance adjuster will review the documented scope of work, the daily moisture logs, and the photo documentation before approving the rebuild portion of the claim. This is why documentation throughout the mitigation phase matters so much.
If the loss involved Category 2 or 3 water, or if elevated moisture readings persisted long enough that mold growth is possible, a post-drying mold inspection is worth scheduling before walls are closed. Catching a mold issue before reconstruction is significantly less expensive than finding it after.
If you need a water damage assessment or want a written scope before committing to a contractor, DRYCOR RESTORE responds 24/7 and holds an IICRC WRT (Water Restoration Technician) credential, meaning the drying process follows the S500 standard from day one.
About DRYCOR RESTORE
DRYCOR RESTORE is an IICRC Certified Firm serving the Tampa Bay area and surrounding communities since 2005 (license CBC1253966). Their crews hold IICRC WRT (Water Restoration Technician), NAERMC mold, and EPA Lead-Safe certifications and handle water damage restoration, water cleanup, mold remediation, sewage cleanup, storm damage restoration, fire damage restoration, emergency board-up and tarping, contents restoration and storage, and general contracting. Available 24/7 for emergency response.